Bu yazımızda STM32VLDiscovery ve buton ile LED yakma uygulaması yapacağız.
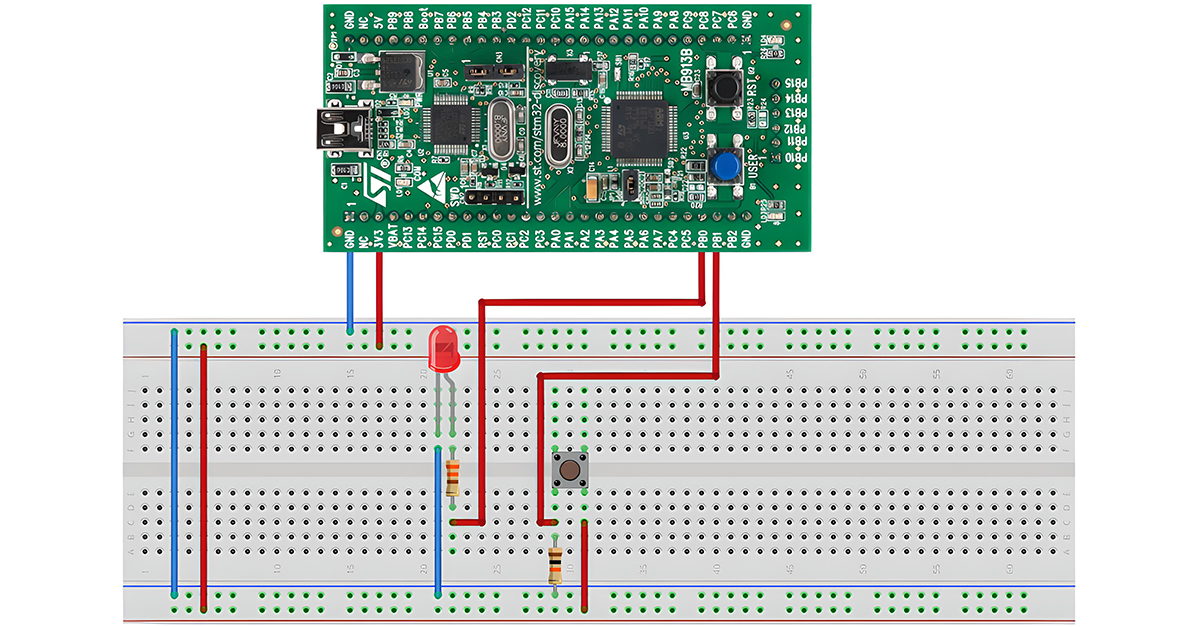
Buton İle LED Yakmak İçin Gereken Devre
Buton İle Led Yakma Kodu
|
1 2 3 4 5 6 7 8 9 10 11 12 13 14 15 16 17 18 19 20 21 22 23 24 25 26 27 28 29 30 31 32 33 34 35 36 37 38 39 40 41 42 43 44 45 |
#include "stm32f10x.h" // Device header #include "stm32f10x_gpio.h" // Keil::Device:StdPeriph Drivers:GPIO #include "stm32f10x_rcc.h" // Keil::Device:StdPeriph Drivers:RCC void InitGPIOs(void); int main(){ InitGPIOs(); uint16_t buttonState=0; while(1){ buttonState = GPIO_ReadInputDataBit(GPIOC, GPIO_Pin_6); if(buttonState == 1){ GPIO_SetBits(GPIOB, GPIO_Pin_0); }else{ GPIO_ResetBits(GPIOB, GPIO_Pin_0); } } } void InitGPIOs(void){ GPIO_InitTypeDef GPIO_InitStruct; RCC_APB2PeriphClockCmd(RCC_APB2Periph_GPIOB,ENABLE); // LED GPIO_InitStruct.GPIO_Mode = GPIO_Mode_Out_PP; GPIO_InitStruct.GPIO_Pin = GPIO_Pin_0; GPIO_InitStruct.GPIO_Speed = GPIO_Speed_50MHz; GPIO_Init(GPIOB, &GPIO_InitStruct); // BUTTON GPIO_InitStruct.GPIO_Mode = GPIO_Mode_IPD; GPIO_InitStruct.GPIO_Pin = GPIO_Pin_1; GPIO_Init(GPIOB, &GPIO_InitStruct); } |
Gerekli Malzemeler
- STM32VLDISCOVERY (STM32F100RB)
- Breadboard
- LED
- Buton
- 330 Ω ve 10k Ω direnç
- Jumper kablo